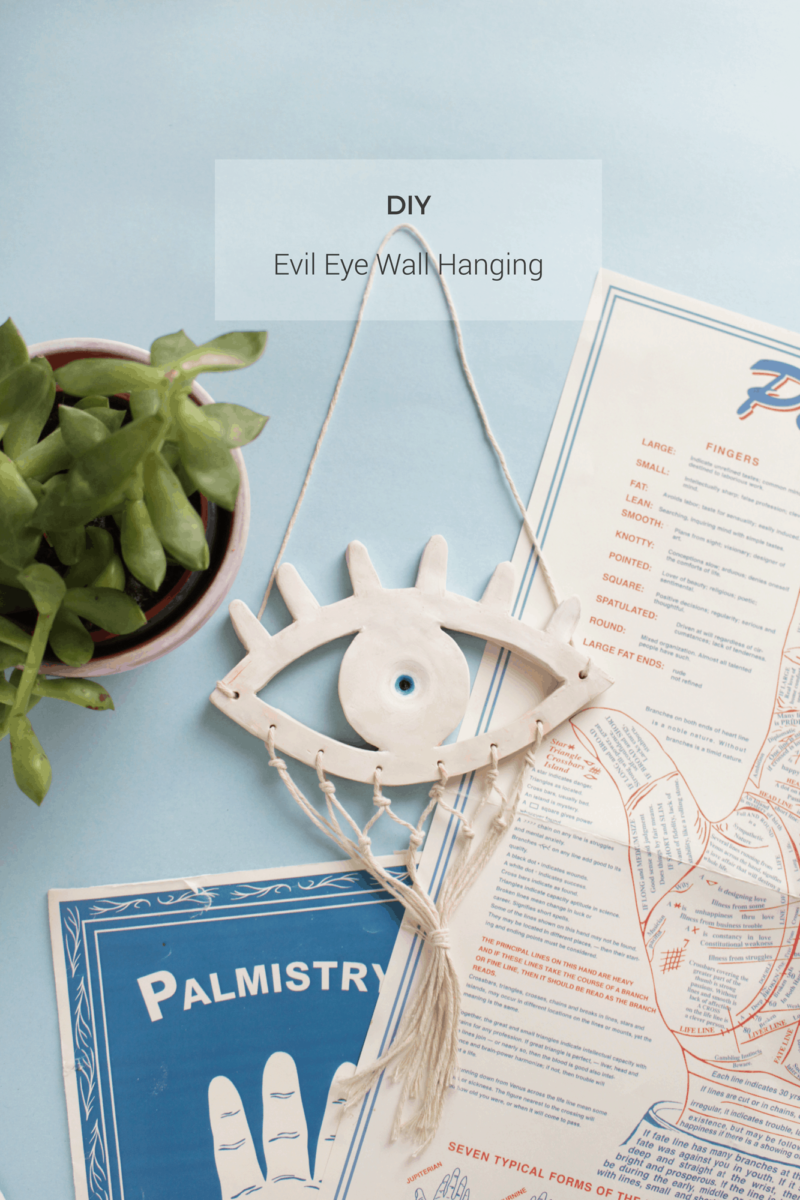
 What’s a girl to do when your home is filled with pretty things and people that you love? Make a DIY evil eye wall hanging of course! If you’ve never heard of it, the evil eye is an ancient belief that an evil eye can injure you or give you bad luck either on purpose or unintentionally through jealousy.
People believed that carrying an evil eye charm protected you from bad energies like a talisman. Before you get spooked and wonder if I really believe I’m under evil-attack, I think the concept is just fun and silly (sorry if you believe it!). But I do secretly hope this DIY evil eye has superpowers to ward off bad energy anyway. Wouldn’t it make our lives easier if it actually worked?!
I love the eye print trend that’s everywhere and I was dying to make an eye motif DIY! The idea of making an evil eye to hang on my front door just popped into my head and I had to do it right away. Ok so don’t freak out. The material list is long, true, but you probably have all of these supplies lying around already. Don’t worry about having to buy anything except maybe the clay.
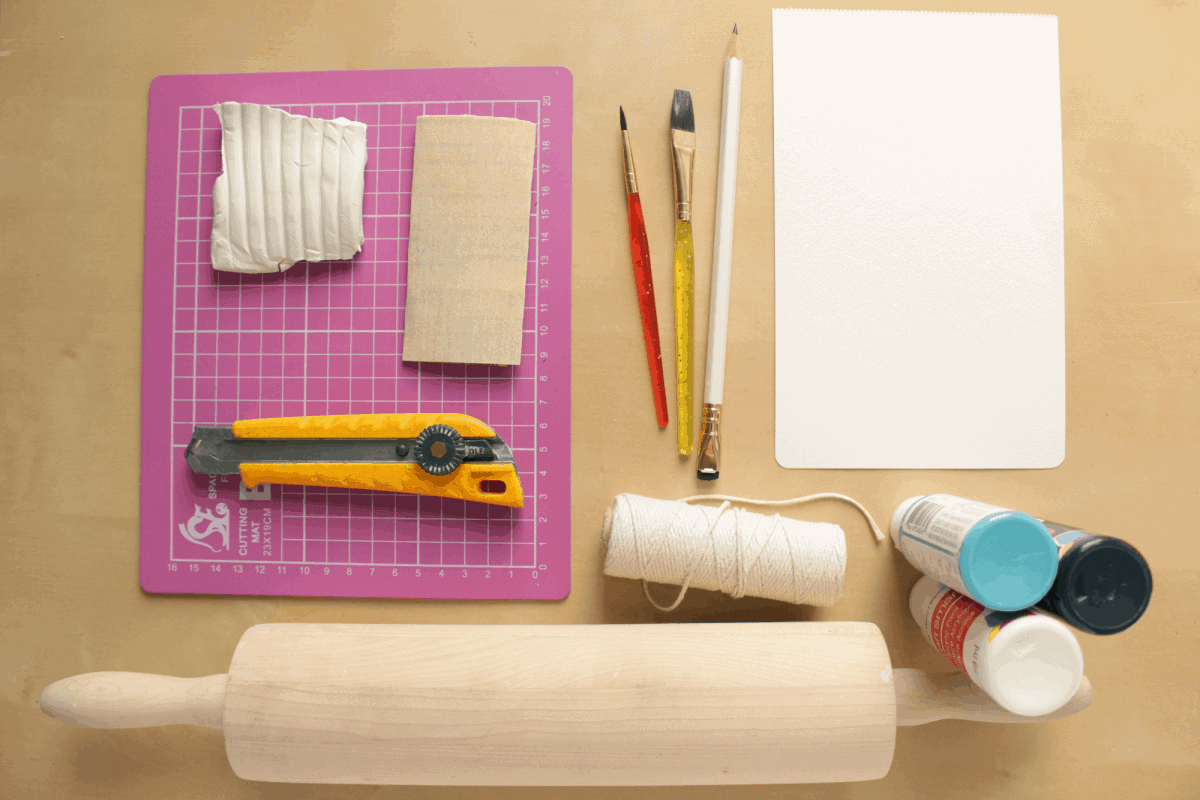
+ Thick Paper (cardstock or similar)
+ Pencil
+ Sculpey or Air Dry Clay
+ Flour
+ Rolling pin
+ Exacto knife
+ Cutting mat
+ Small round objects (Ping pong ball)
+ Toothpick
+ Fine sandpaper
+ Acrylic paint – white, blue, black
+ Paintbrushes
+ String
+ Small round objects (Ping pong ball)
Directions
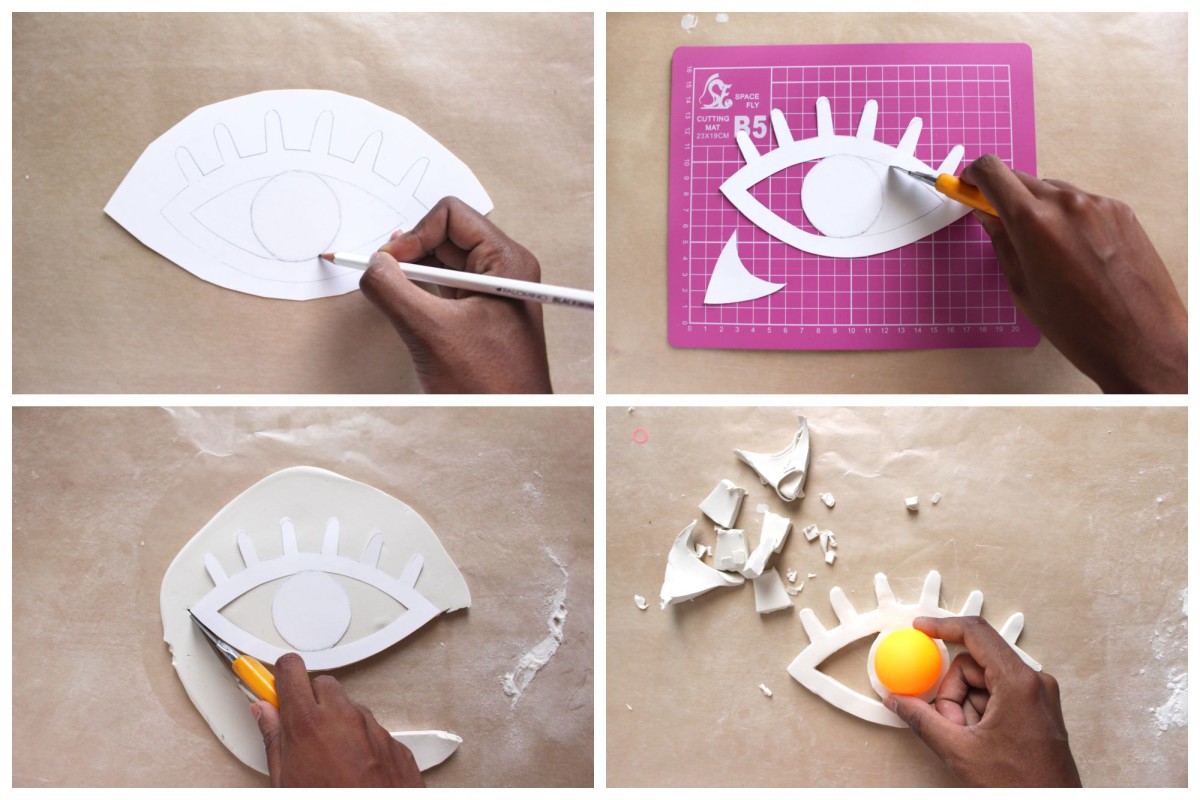
1. On a piece of paper, draw an evil eye design that you will use as a stencil to cut the clay design. Cut out the design using an exacto knife to cut out the middle bits.
2. With your clay, form a smooth ball and then roll it flat with your rolling pin. I rolled it out to about 1/4″ (6mm) thickness.
3. Lay the eye stencil on top of the clay and using an exacto knife, cut around your design. Use about 1″ of blade when you’re cutting through the clay. It will allow you to move the blade easily like a long knife and it won’t snap if you don’t put a lot of pressure on it. Move your knife very slowly so that you don’t slip and cut yourself.
4. Remove the excess clay. The clay will not look perfectly smooth yet but you can fix this with sandpaper later.
5. In the center of the eye, using round objects indent your clay to create an inverted eyeball. I used a ping pong ball, then the round end of a paintbrush and then the smaller end of a makeup brush. This will add some dimension and depth to the eye!
 6. Mark and create holes with a toothpick where you will insert string for hanging your piece and for decorative string at the bottom. I added 6 holes at the bottom to mimic eyelashes. Make sure the holes are big enough to fit string as I barely could push my string through! Oops.
7. Bake or air dry clay according to the package instructions.
8. Once dry, sand off any rough bits of clay that bother you, very gently especially around the eyelashes.
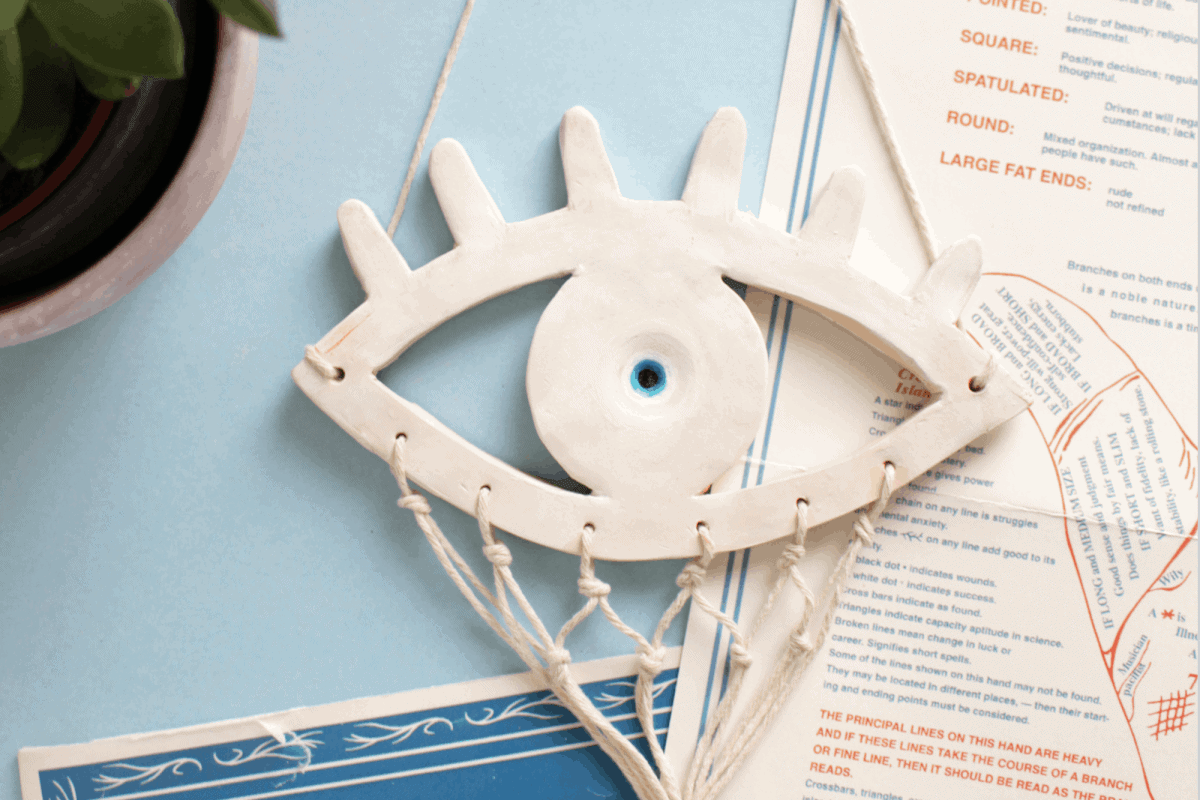
9. Paint your piece with a diluted mix of white paint and water. To draw a pupil, paint the small hole black and then outline with blue paint. I painted the bigger circle with a clear glaze, but this is optional.
10. Insert your string at the top and bottom. Use an embroidery needle to pull the string through if you have to.
11. For the faux eyelashes, after you tie the first knot, knot a string with one from the neighboring pair of strings. Then tie off. Or you can do a much more complicated macrame pattern if you want.
Imperfections look good on clay, so definitely don’t worry about perfection with this project. I really like how raw and minimal the clay looks with a hint of blue. Evil eyes traditionally come in blue and I’m not complaining because this summer I’m obsessed with ocean blues. This is one DIY that looks great on my door and makes a cute conversation piece as friends are coming or going. And who knows, maybe it does have magical superpowers that keep the good vibes coming… I guess you’ll have to try it and see.



This is SO cool! I’m currently obsessed with evil eyes and I’ve been putting them on everything lately. 🙂
xx Hannah // TheCheapishly.com
They’re kind of amazing, right! Glad you like it!
LOVE this!! I am wanting to make my own and I’m just wondering what you used. The Air dry or regular bake clay??
XOXO
Thanks Megan! I used oven-bake clay because I had a lot but you can easily use air dry clay too. Good luck!