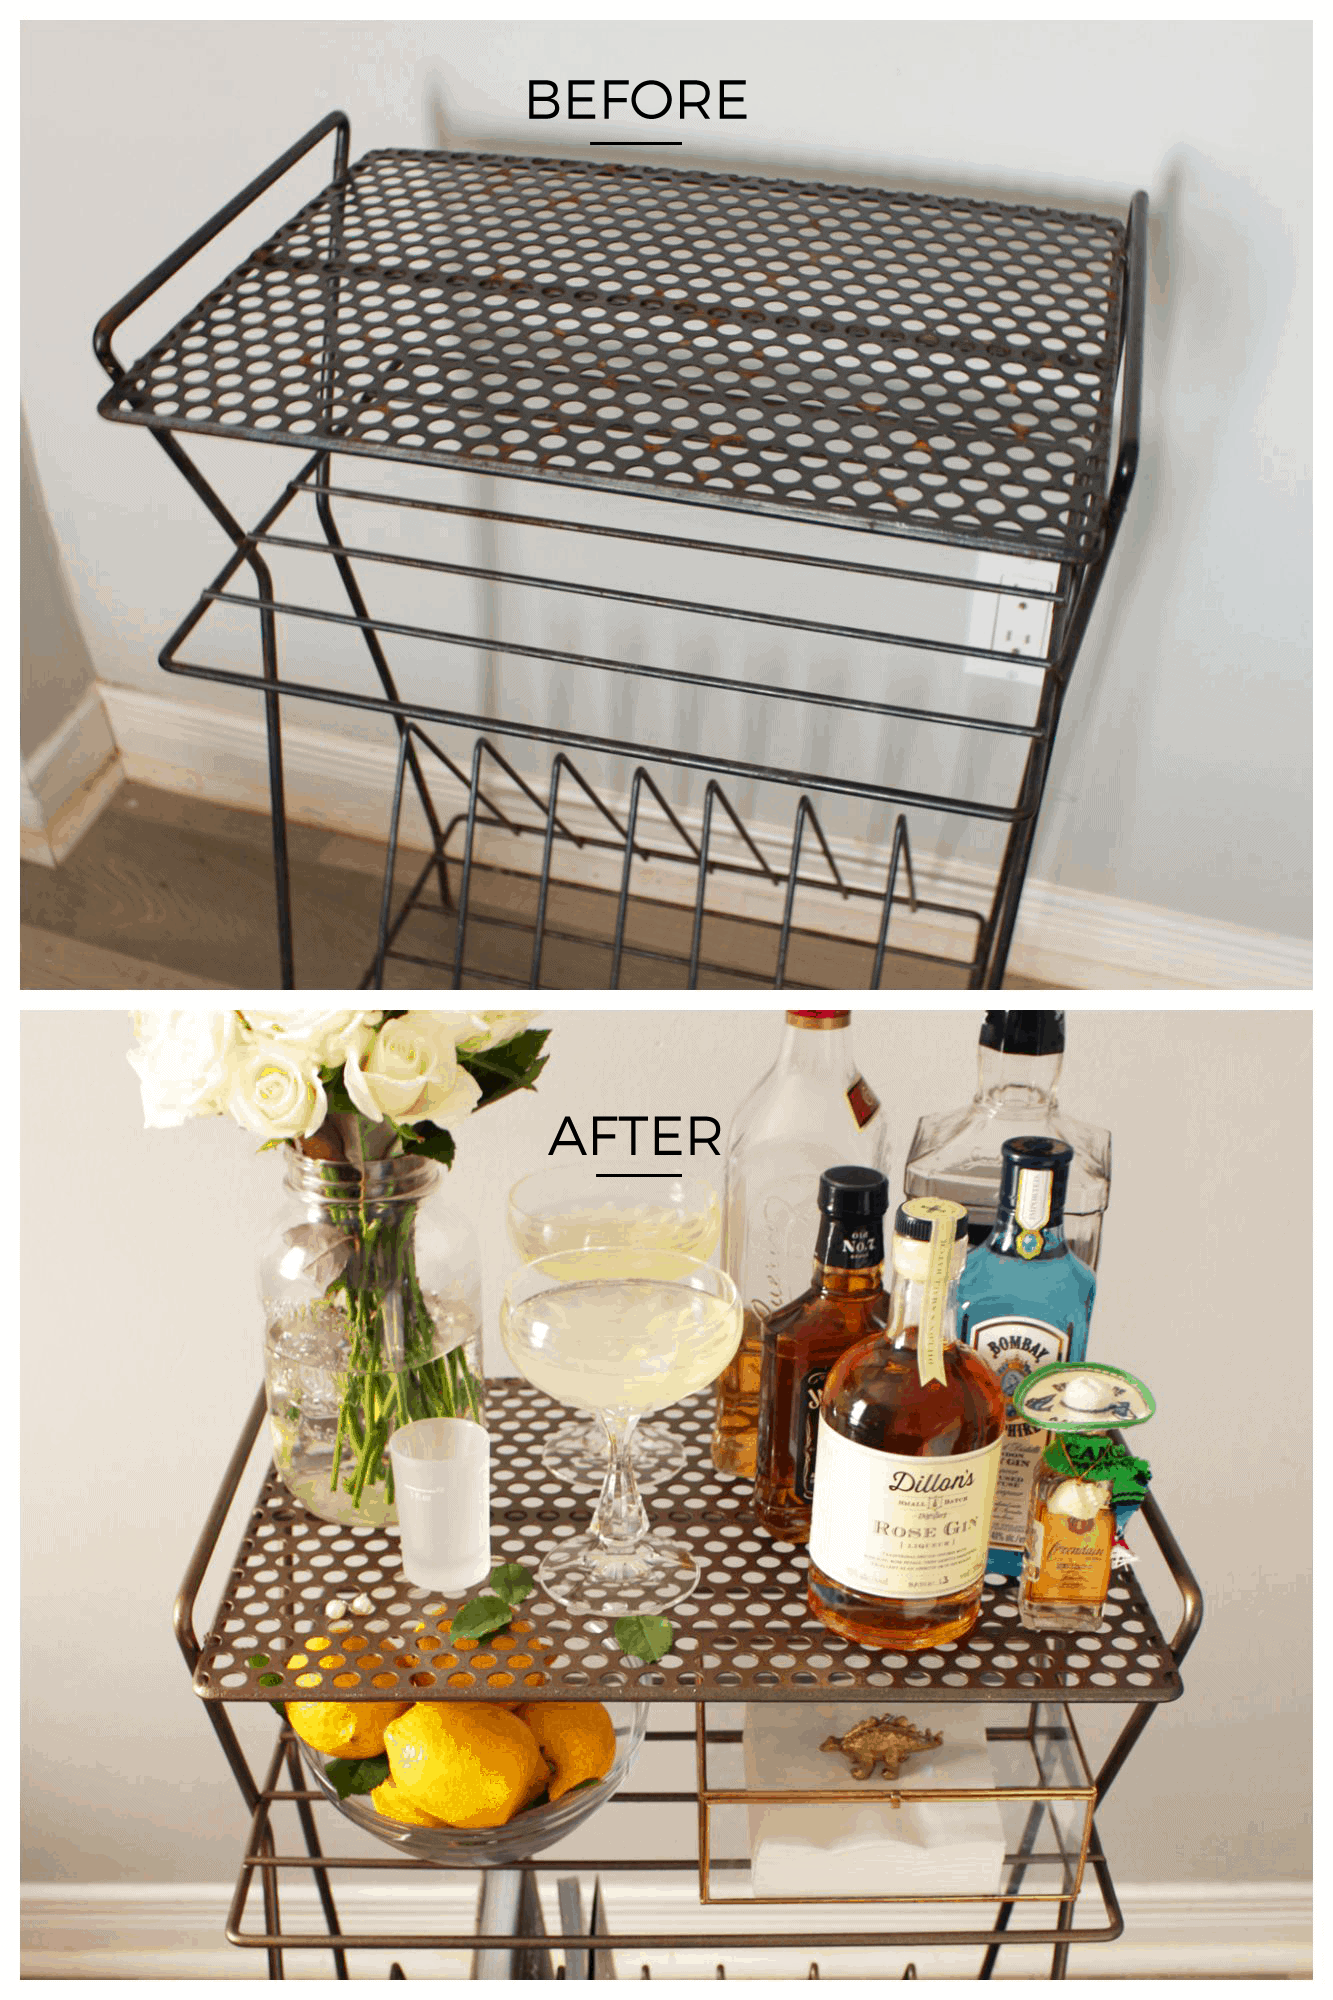
 I have a super fun, easy little project to share with you this week which involves a furniture makeover as part of my new blog category, Before & After! With just a few minutes, a bit of TLC and spray paint you can transform a vinyl record rack into a bar cart.
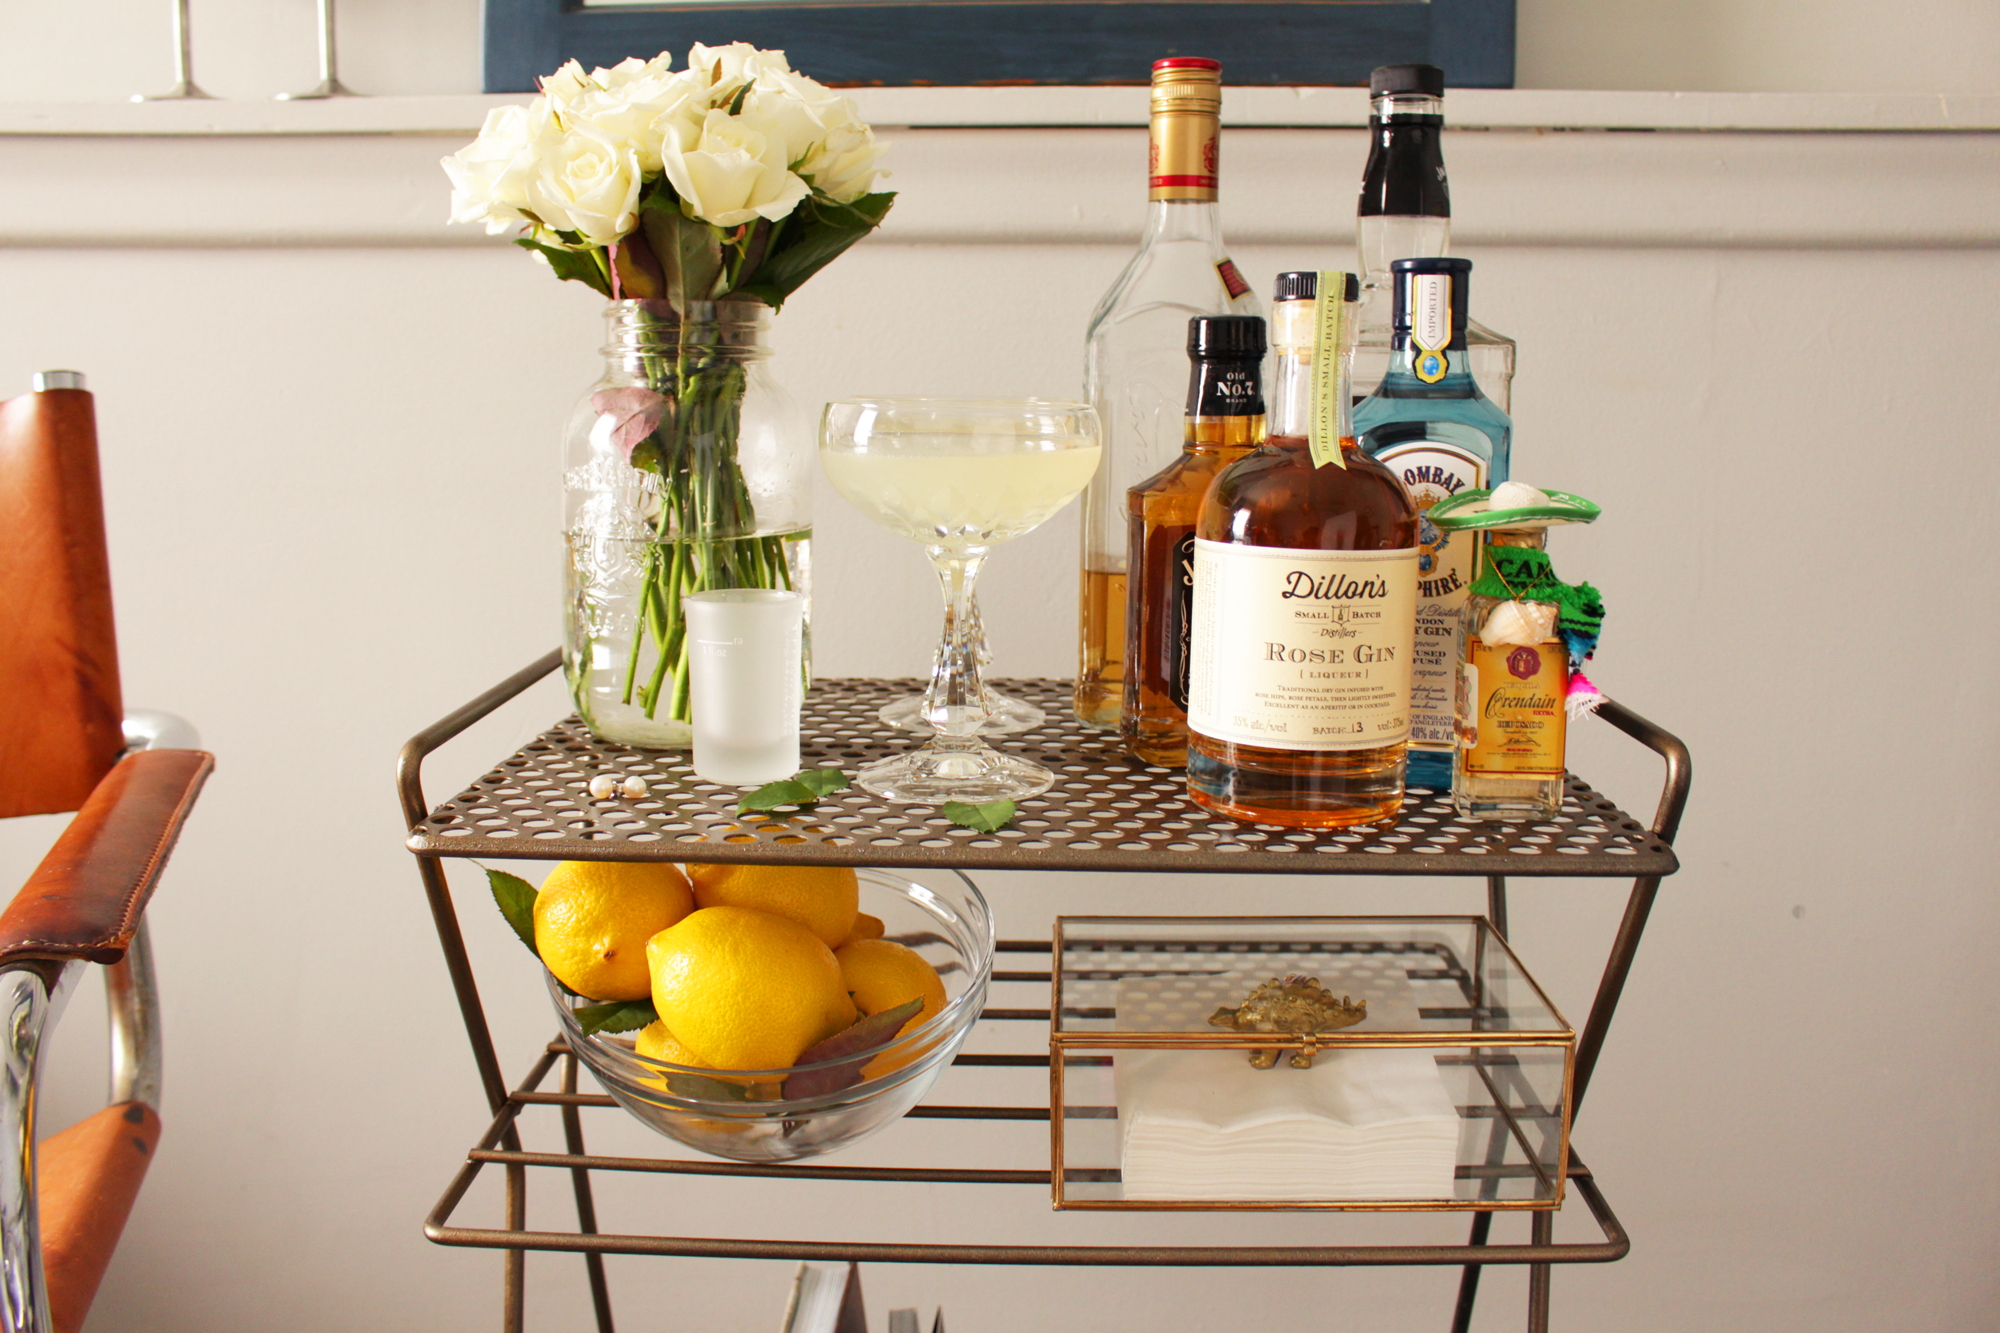
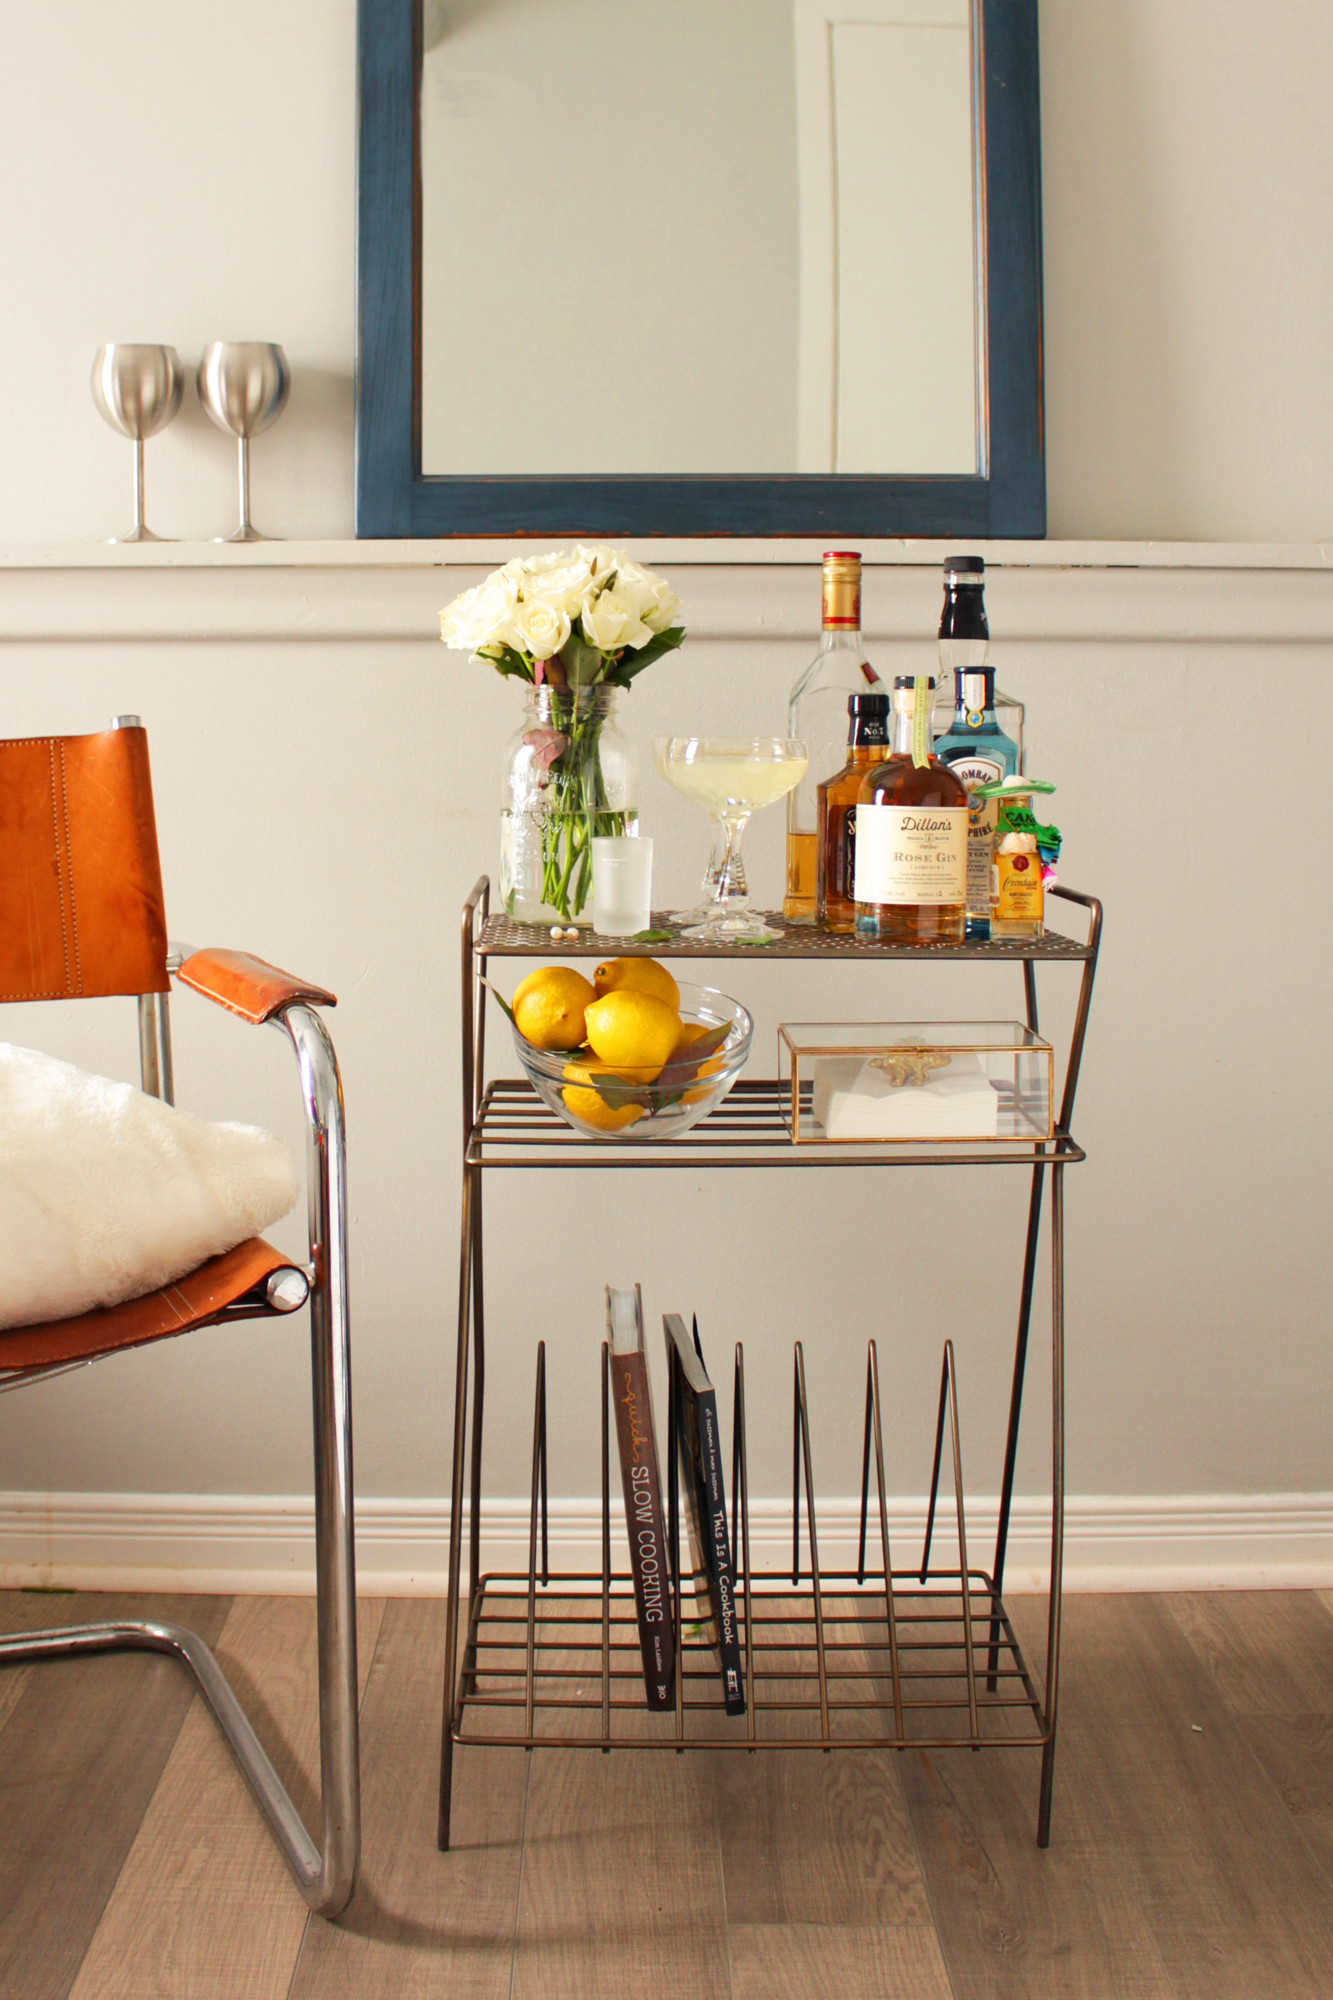
 I’ve always wanted a little liquor cabinet or bar cart in my home because every adult on TV seems to have one. Digging around your fridge for a beer when you have guests over is so college frat party so I needed something to display our liquor as fancy adults do.
As luck would have it, a couple of weeks ago on a coffee run I found a discarded vinyl record rack. M already has a bookshelf which stores his record collection so it occurred to me that the storage rack would instead make the perfect little bar cart to display our liquor. It has a little shelf which can be used for napkins, straws and other bar tools and the lower rack portion can be used for storing cocktail recipe books and other cookbooks.
lf you have a vinyl record rack already or find a cheap one, you can easily transform it into a classy and chic bar cart. It’s the perfect small-space solution to keep a liquor collection organized and tidy.
 Directions
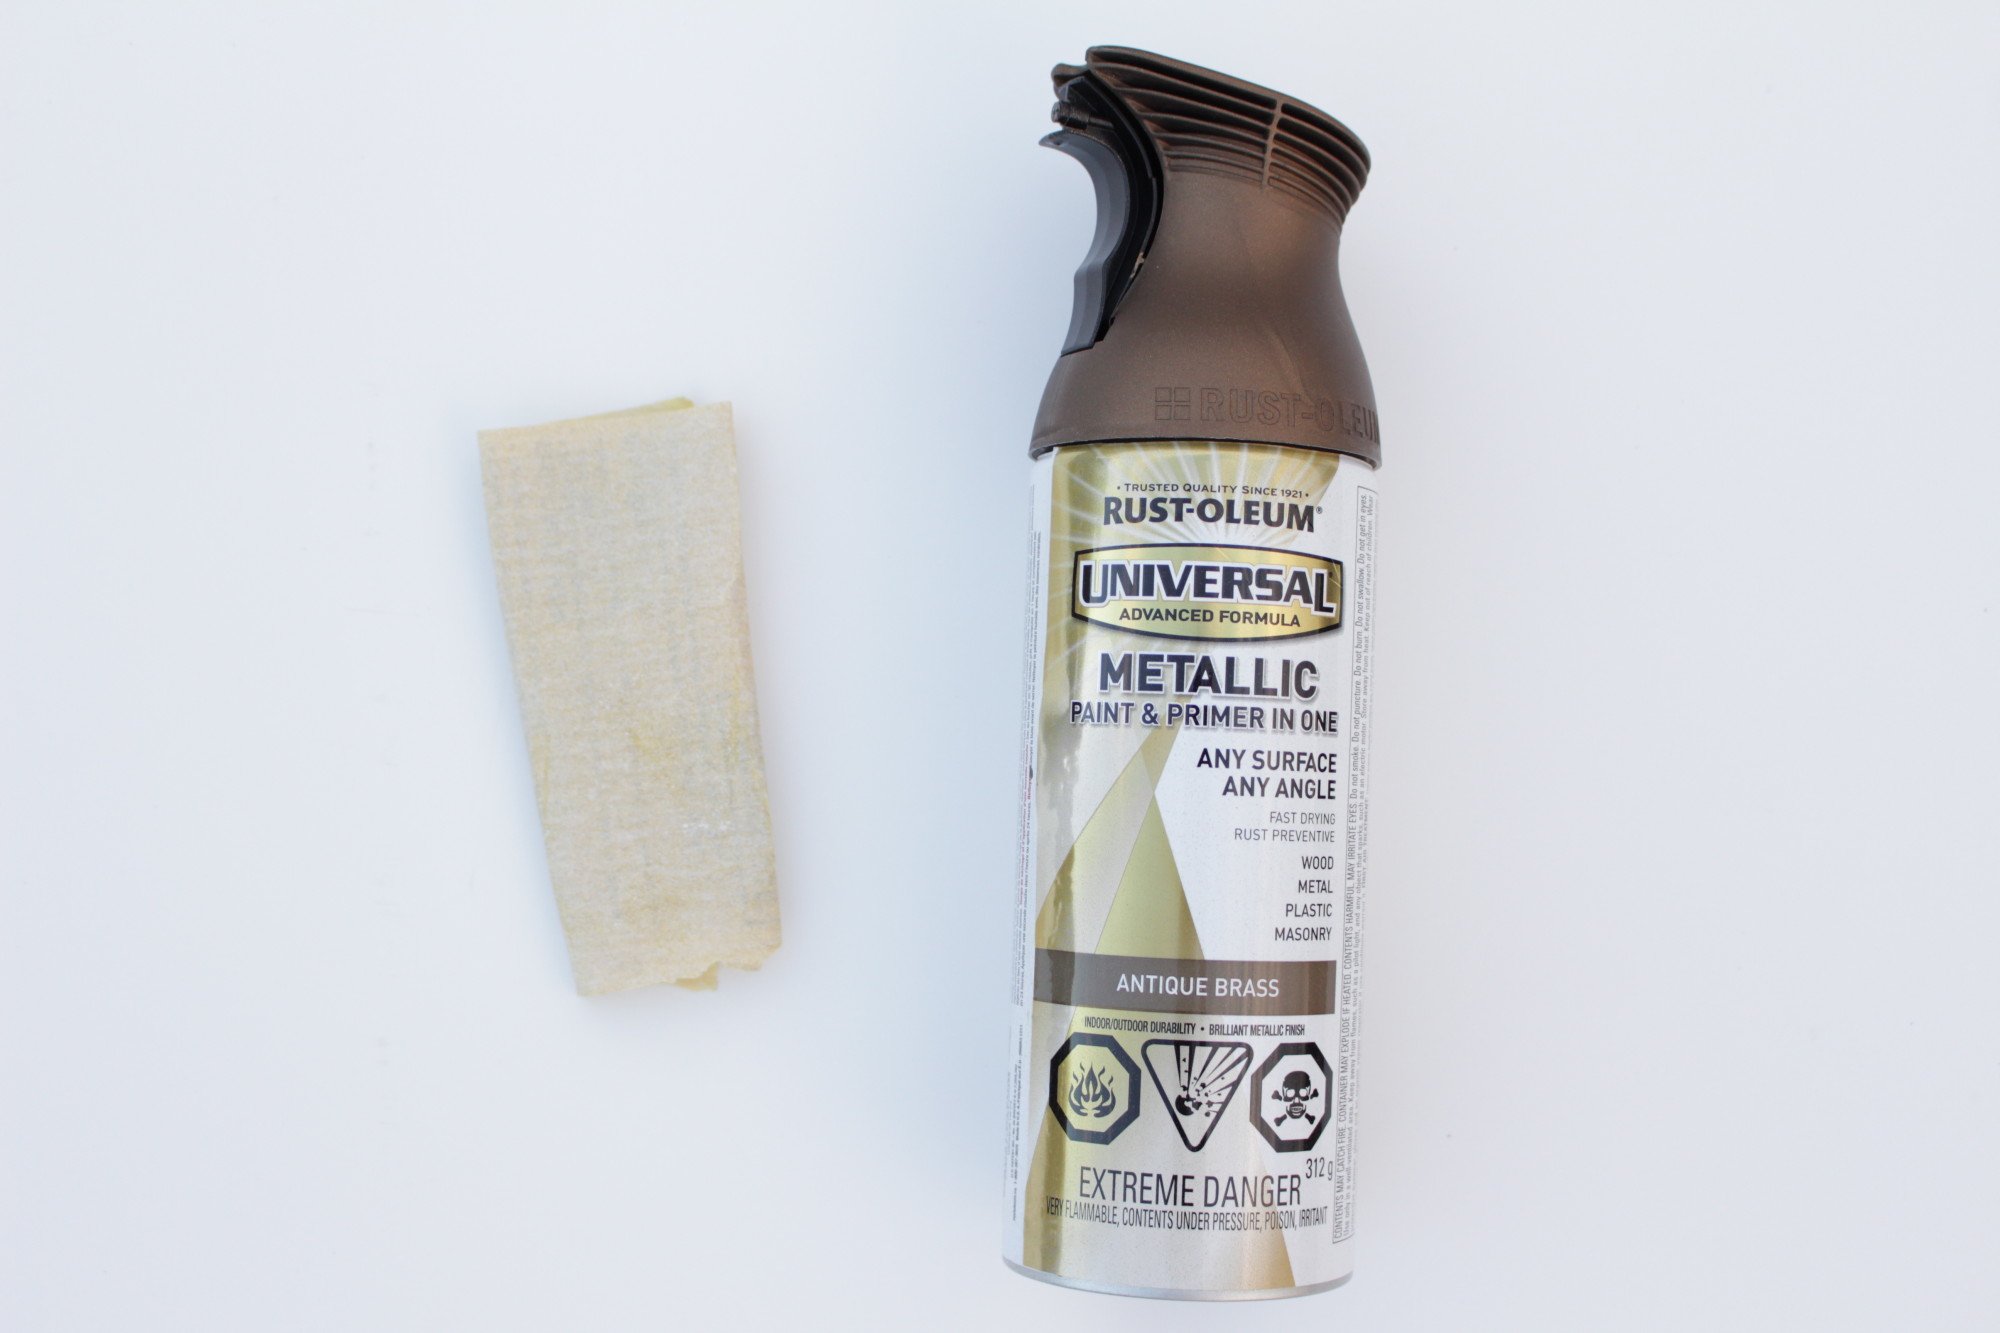
1. Sand the vinyl rack to remove any chipping paint (if necessary) and to prep the surface.
2. Spray paint the rack using thin coats until you’re happy with the result. I recommend using the Rustoleum Metallic in Antique Brass which looks so authentic and brassy (I’m not getting paid to say this) and it has a built-in primer to save you time. Wait several minutes in between each layer to allow it to dry.
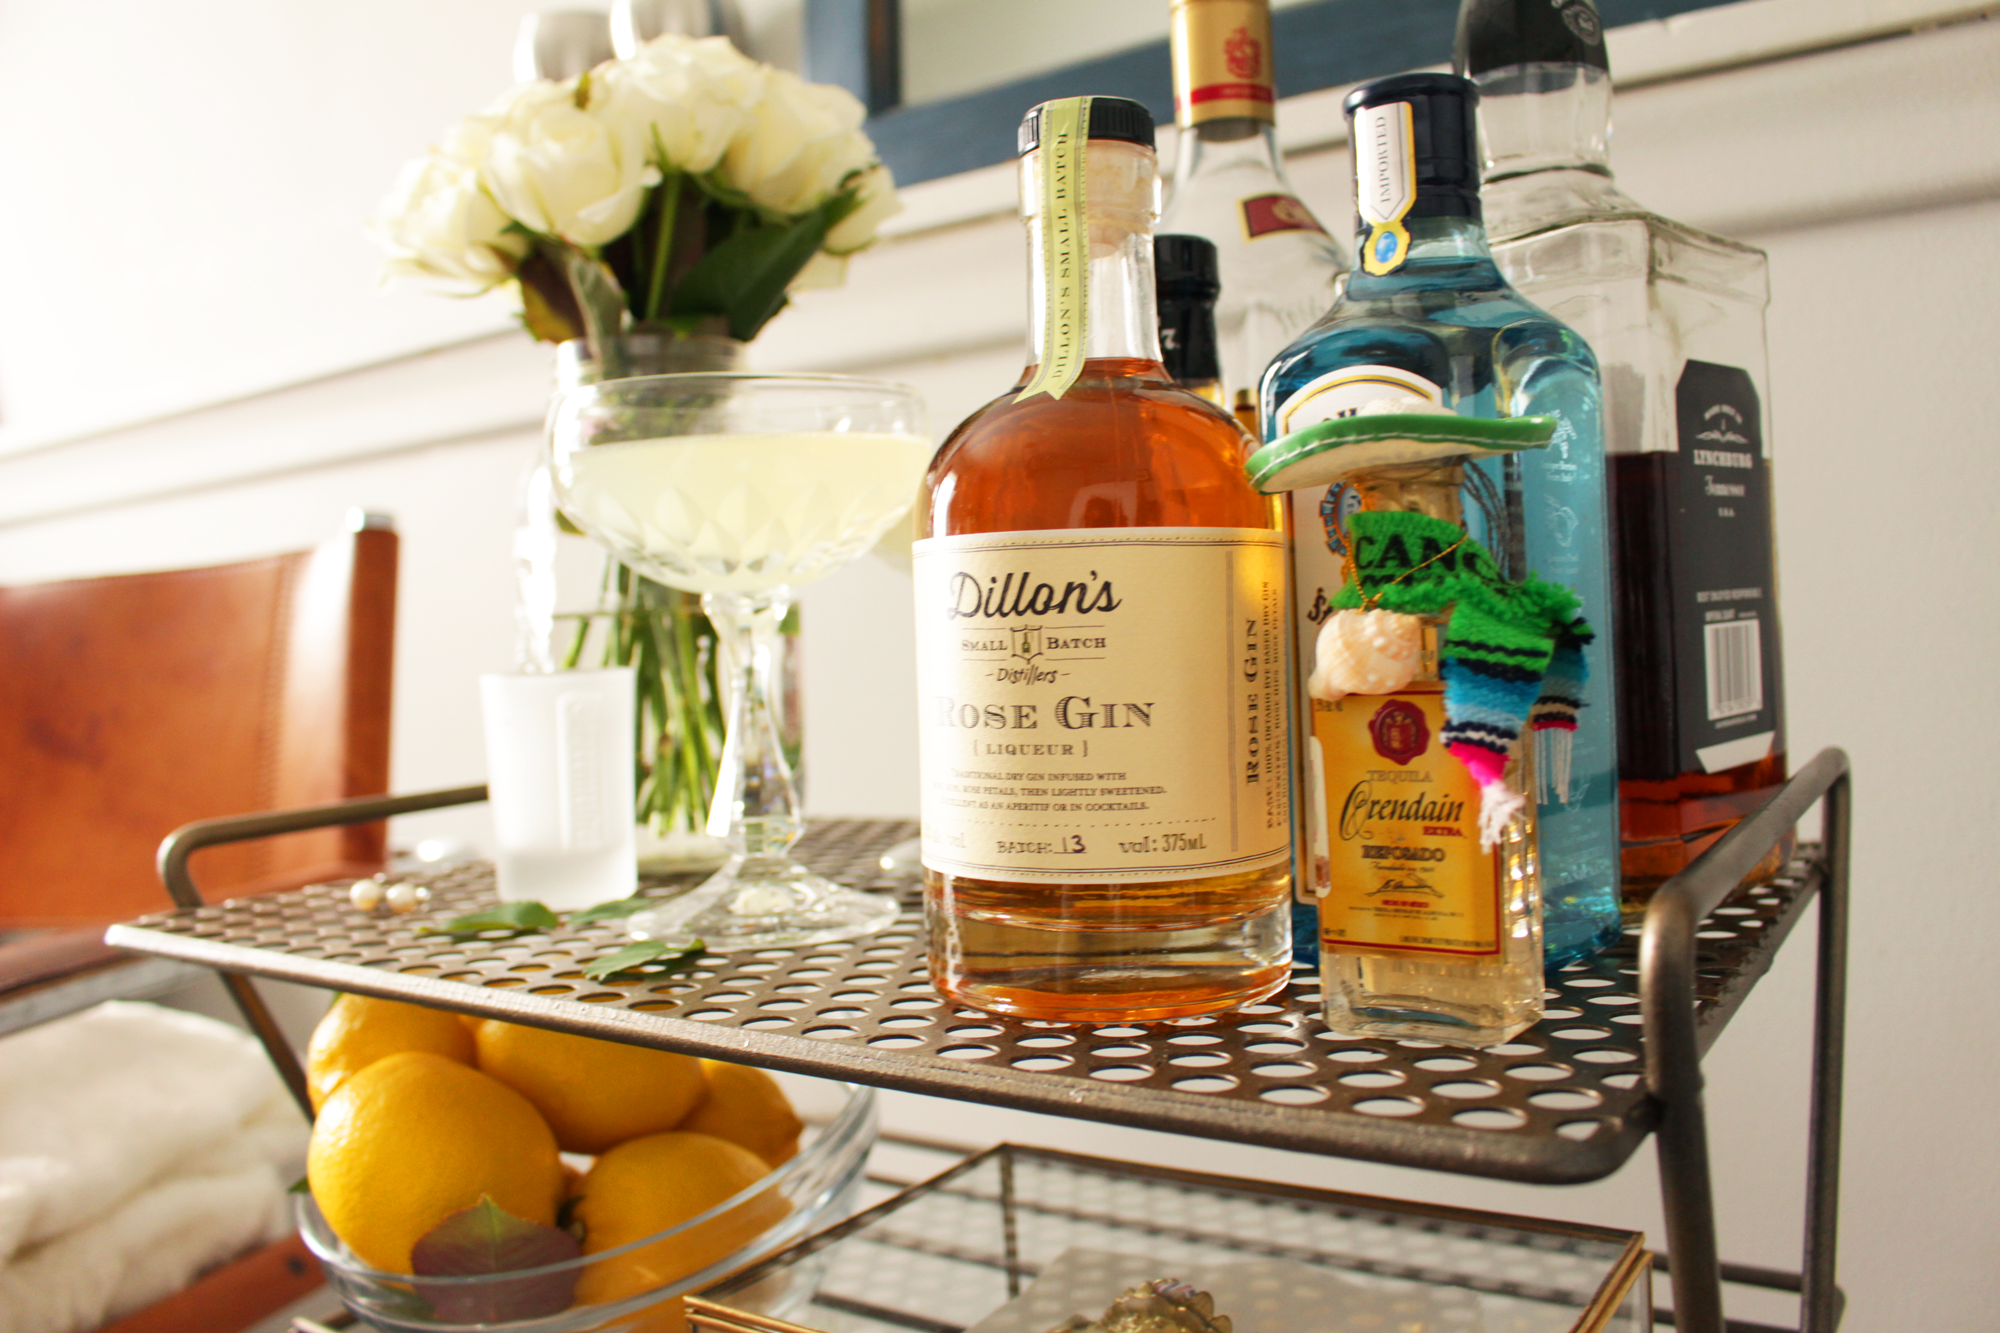
3. Style with a few basic spirits like vodka, gin, tequila, rum, etc. Have a few mixers on hand so you can experiment with cocktails.
4. If you find them useful, you may want to include bar tools like a cocktail shaker, strainer, a muddler and a bar spoon. For my bar cart I kept it very basic with glassware, straws and napkins but when the holidays come around, I’ll add a few more fancy bar tools.
Remember to store your liquor in a cool place away from direct sunlight so that your liquor keeps for a long time. And if you have non-drinking friends, you could also include a few non-alcoholic options and sodas. Next time you want to try out a new cocktail recipe, you can have all your bar ingredients in one place and experiment with new combinations. Cheers!