

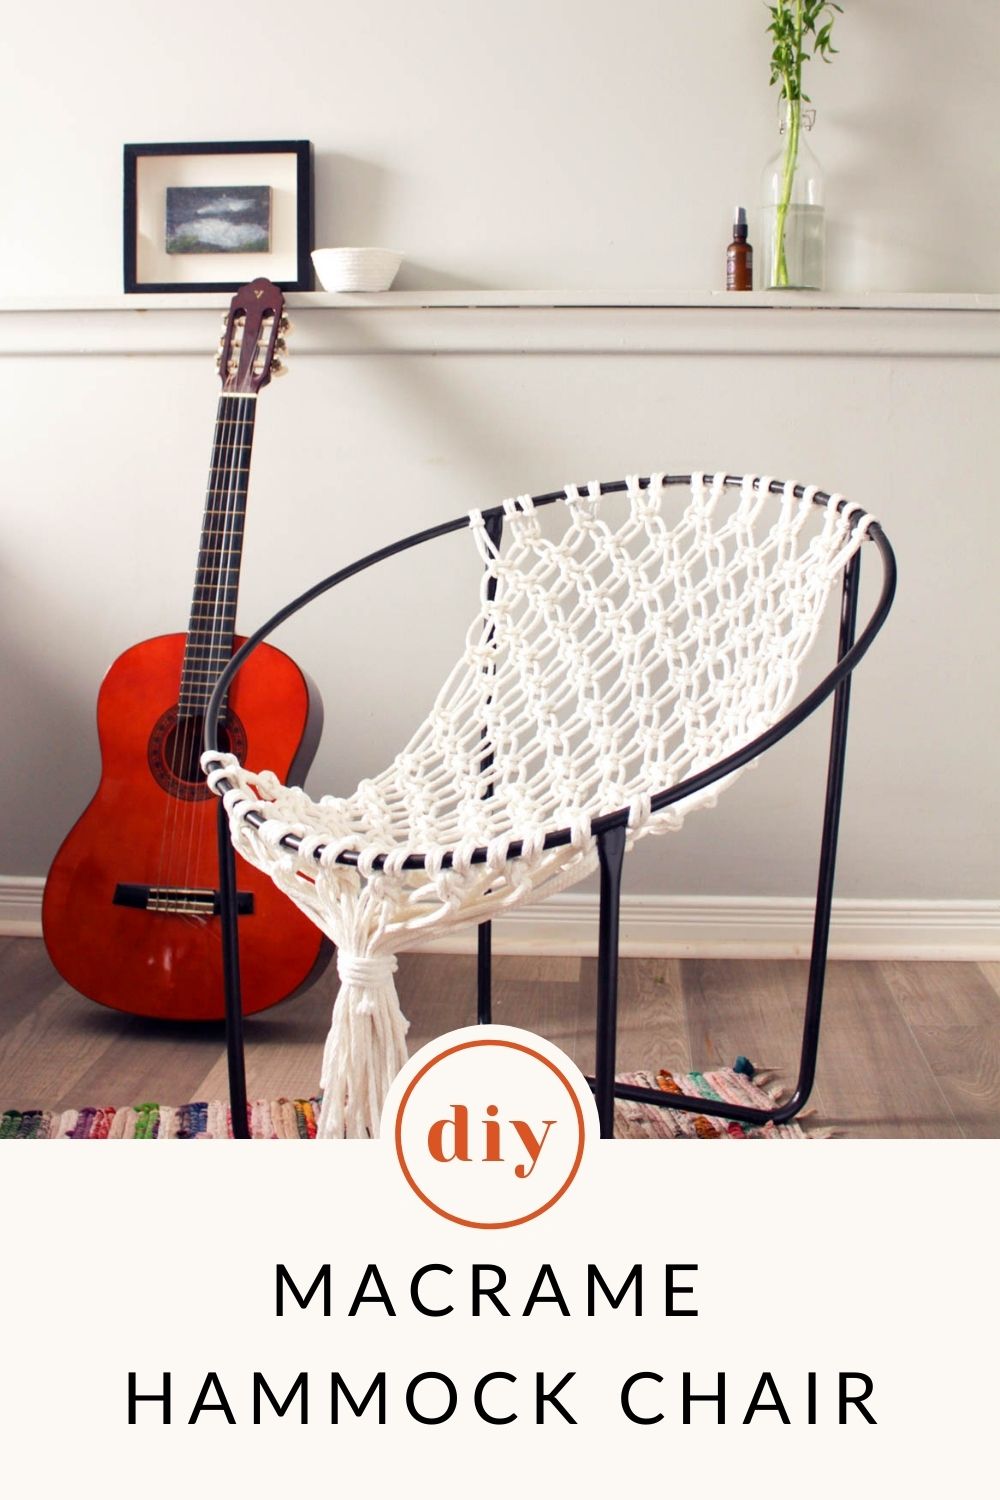
This beginner-level macrame hammock chair is perfect for your backyard or anywhere you want to kick up your feet and relax.

This post contains affiliate links which means I’ll receive a small commission if you purchase through my link, at no extra cost to you.
Would you believe that this is the FIRST macrame project I’ve ever done?! It’s the one that got me hooked on macrame because it was actually so easy to make.
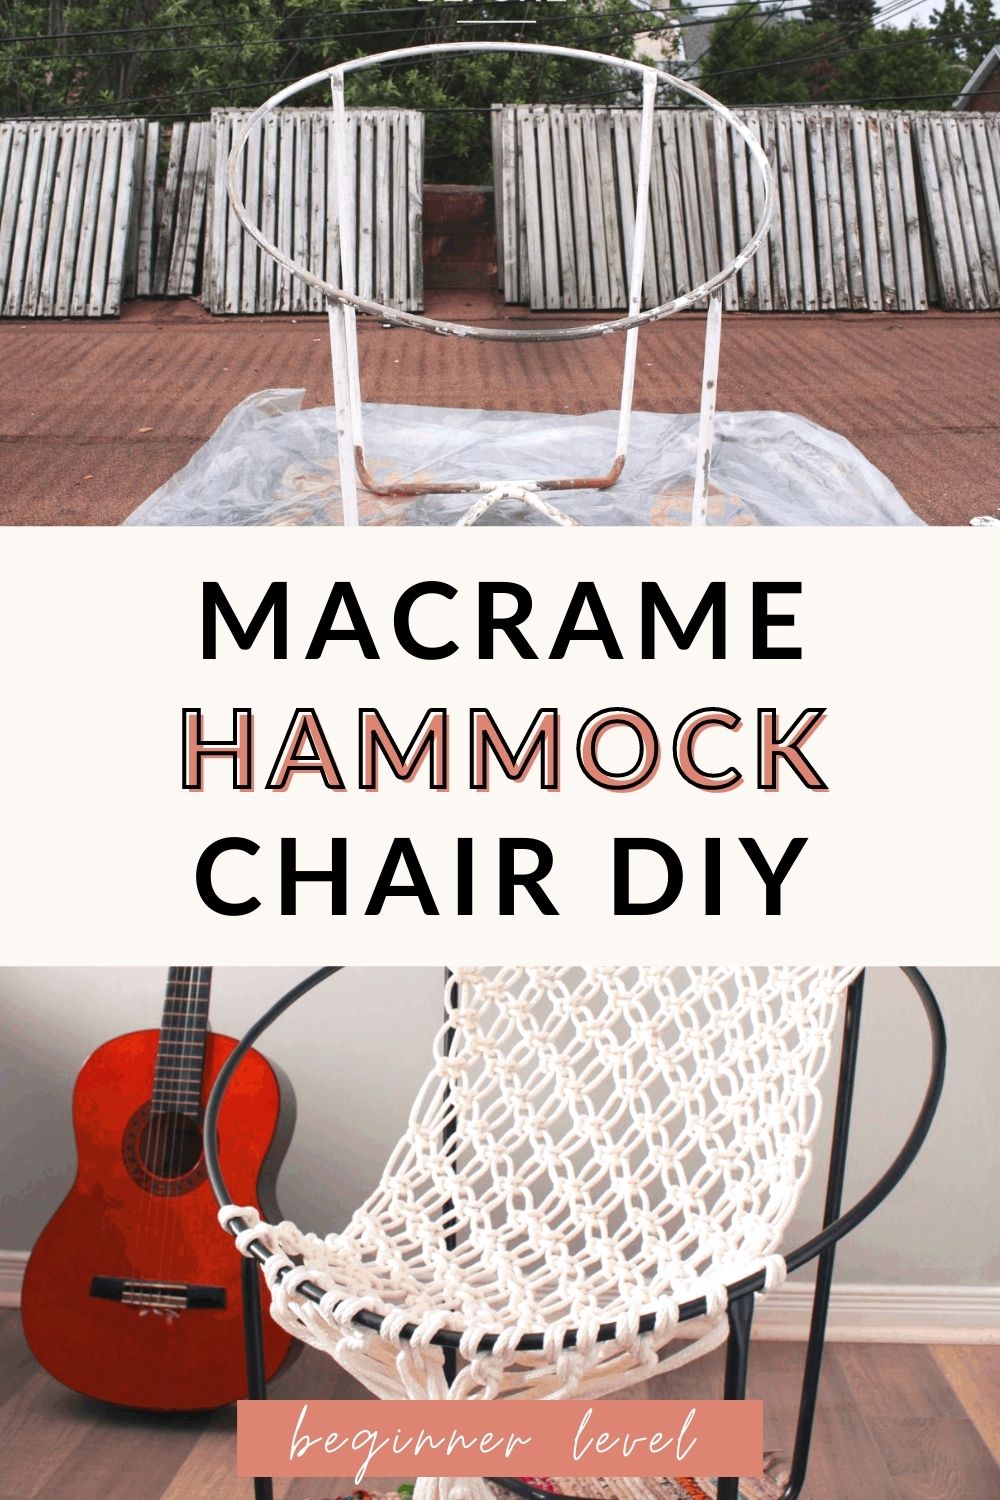
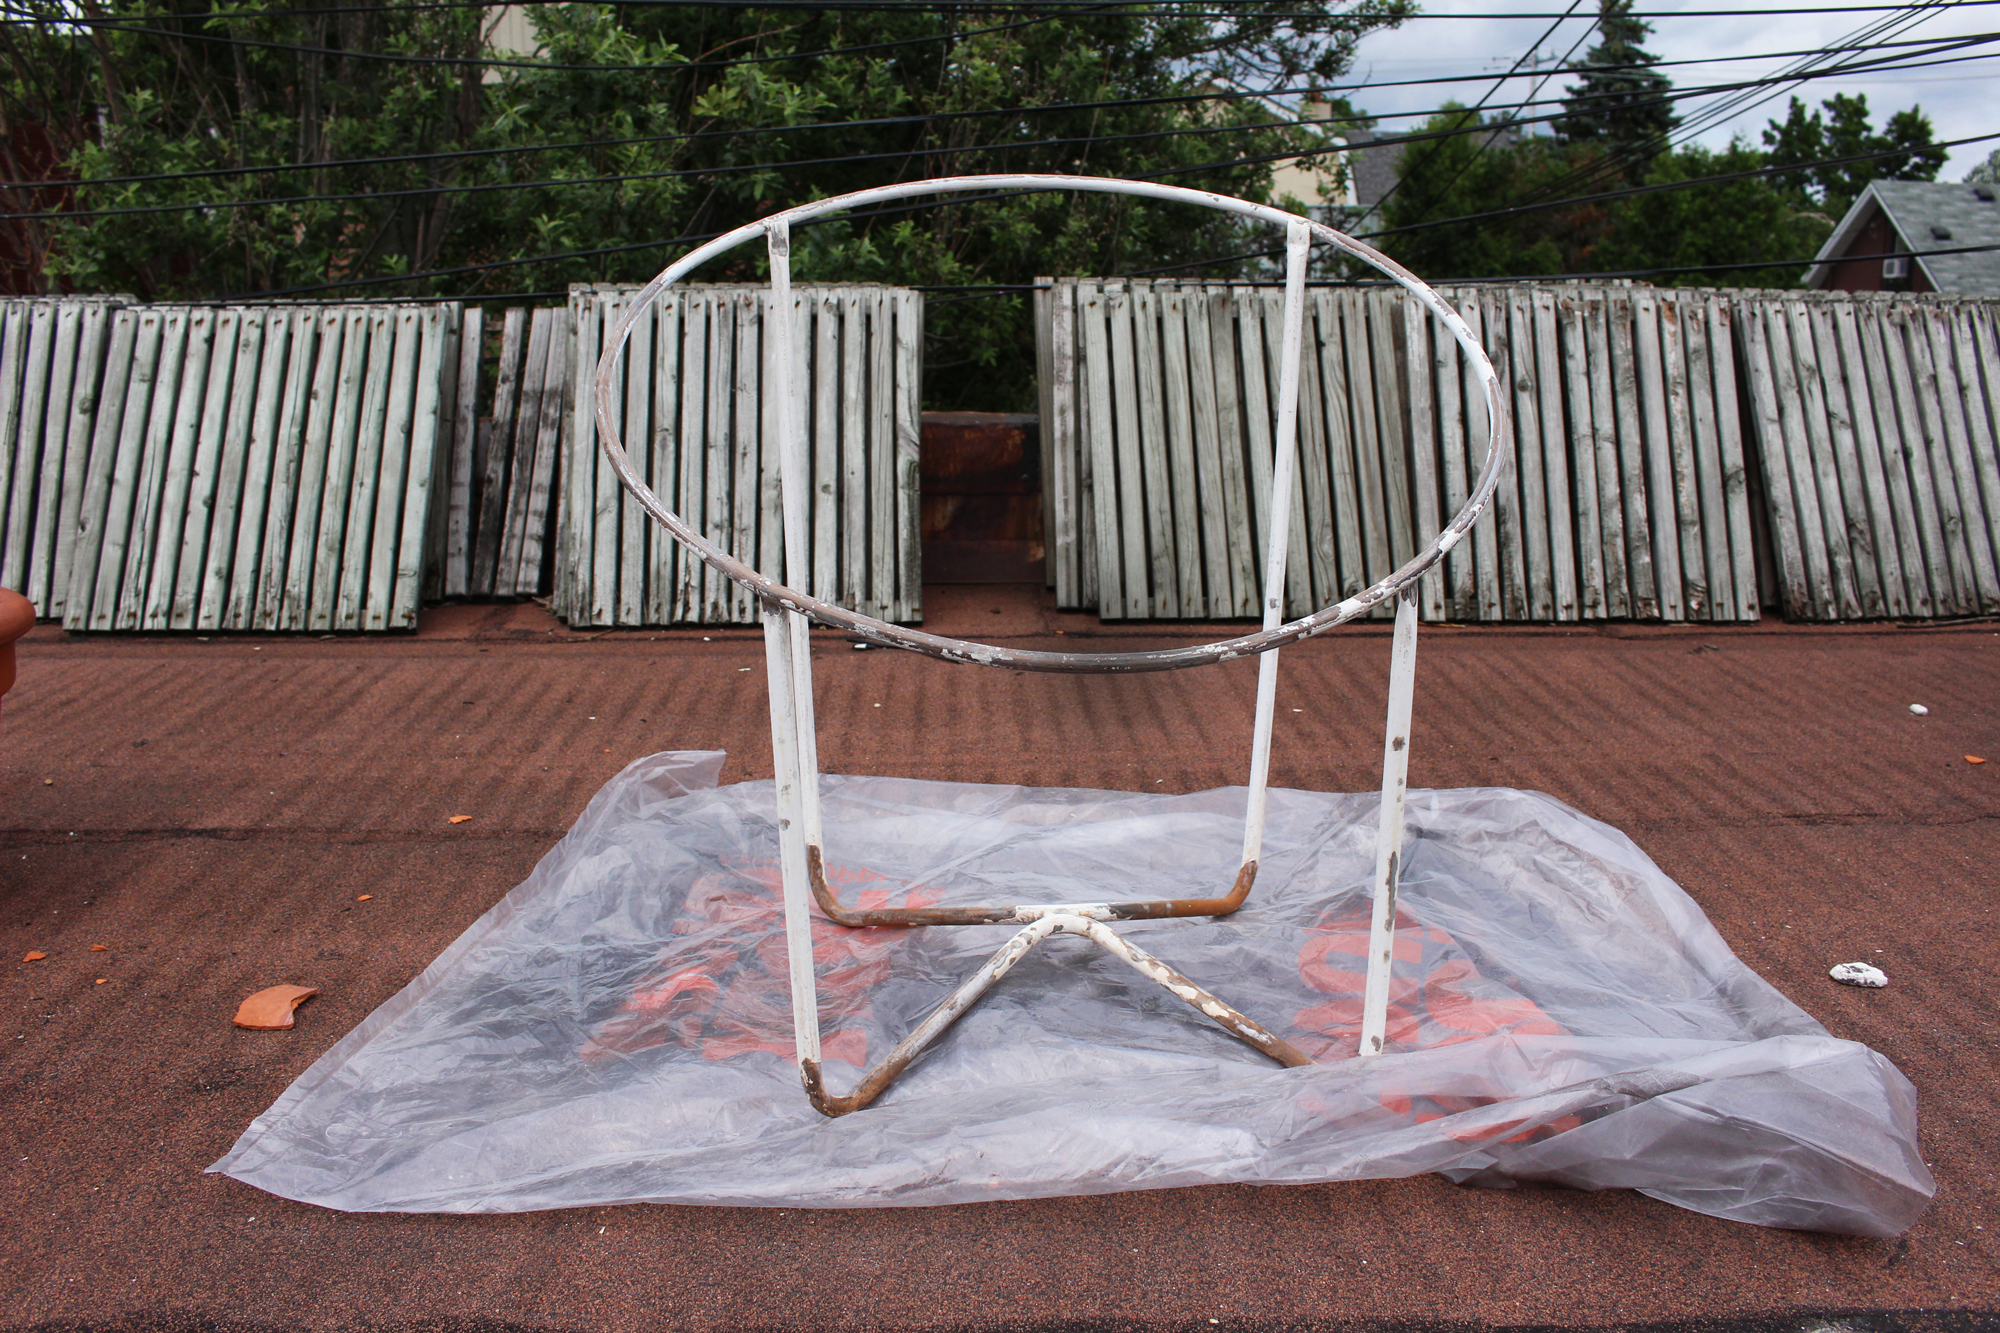
All you need is a chair frame, macrame cord and my free macrame pattern.
I would recommend starting with a big chair frame like this one from Amazon. There are other options on Amazon but double check the size to make sure it’s for adults.
I recommend ordering your macrame cord online on Amazon or Etsy where you can find good quality macrame cord for an affordable price.
Materials
- Sharp scissors
- Circular chair frame like this one
- Macrame cord
 : you can find lots of color options on Amazon or Etsy (look for 4mm or 5mm thickness)
Instructions
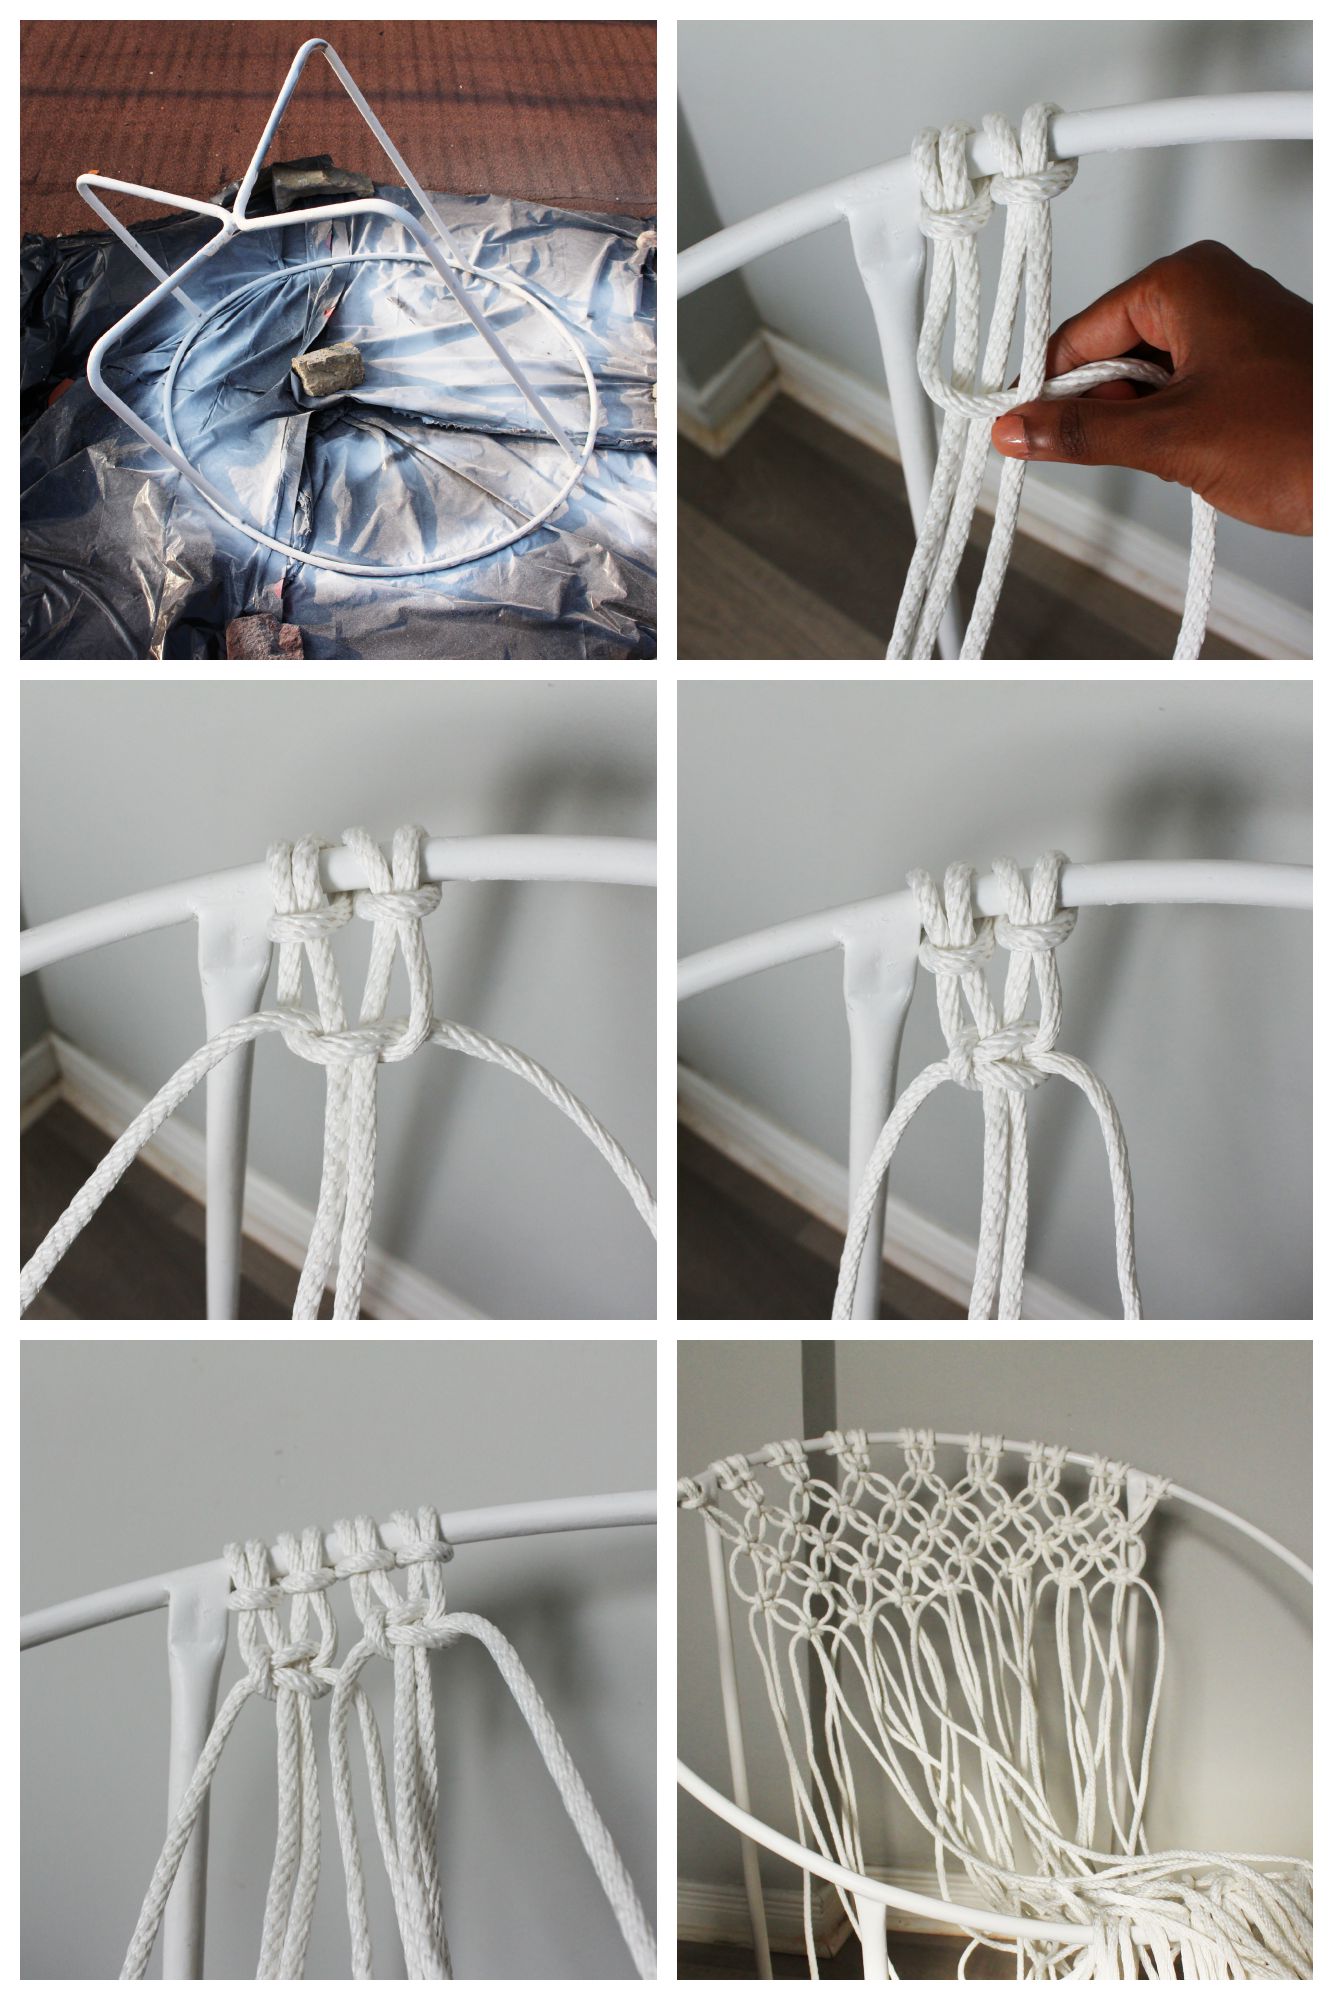
1. To create the macrame hammock, cut 16 pieces of cord to be 16 foot length. You’ll be folding the cord in half and knotting it which will shorten the length.
2. Using one cord folded in half, loop it around the top of the chair frame, pulling the ends through the loop to secure it. Continue looping all the cords around the frame like this.
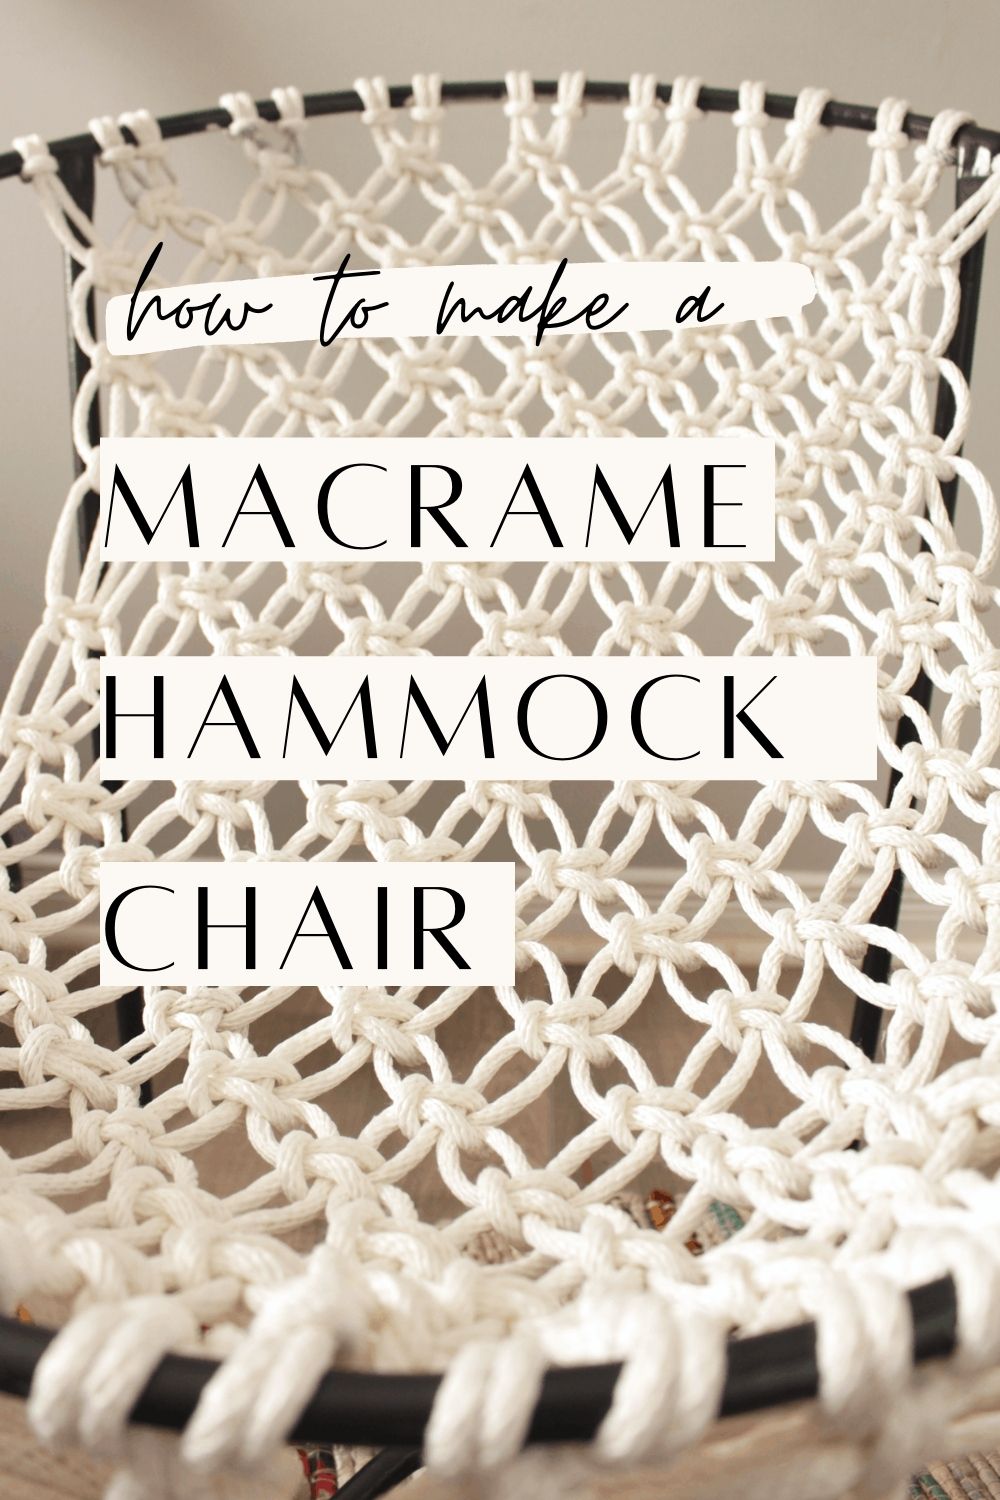
3. To create the pattern, you’ll be using a macrame square knot. With the first pairs of cords (4 strands) cross the left cord over the centre and under the right cord. Hold it in place with your finger.
4. Now, do the opposite. Take the right cord and loop it under the centre two cords and through the hole, over the left cord.
5. To complete the knot, repeat steps 7 and 8 in reverse. Cross the right cord over the centre cords and under the left cord. Take the left cord and loop it under the centre cords, through the hold and over the right cord. Tighten the knot. Complete the row like this.
6. On the next row, start the square knot with the third cord. Use two cords from the first group and two of the neighbouring cords from the next group to create your next square knot.
7. Continue this all the way down. When you’ve completed the macrame hammock, knot it twice around the bottom frame of the chair. Trim the excess rope off.
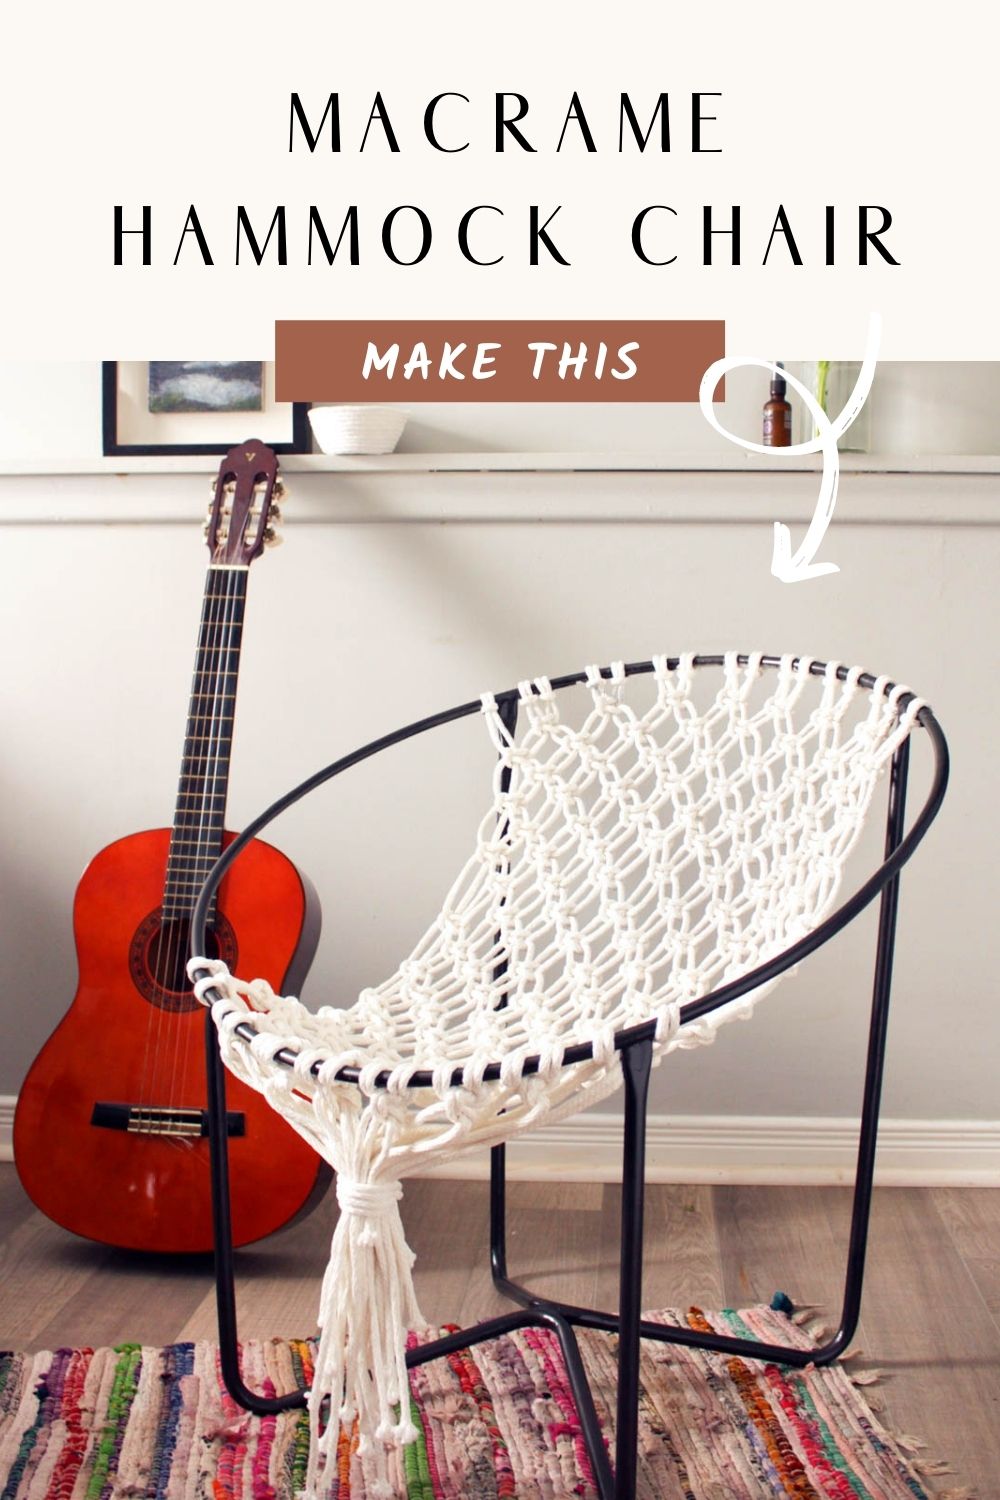
8. With an extra piece of rope, gather all the hanging pieces of cord and tie them together. Enjoy your new chair!

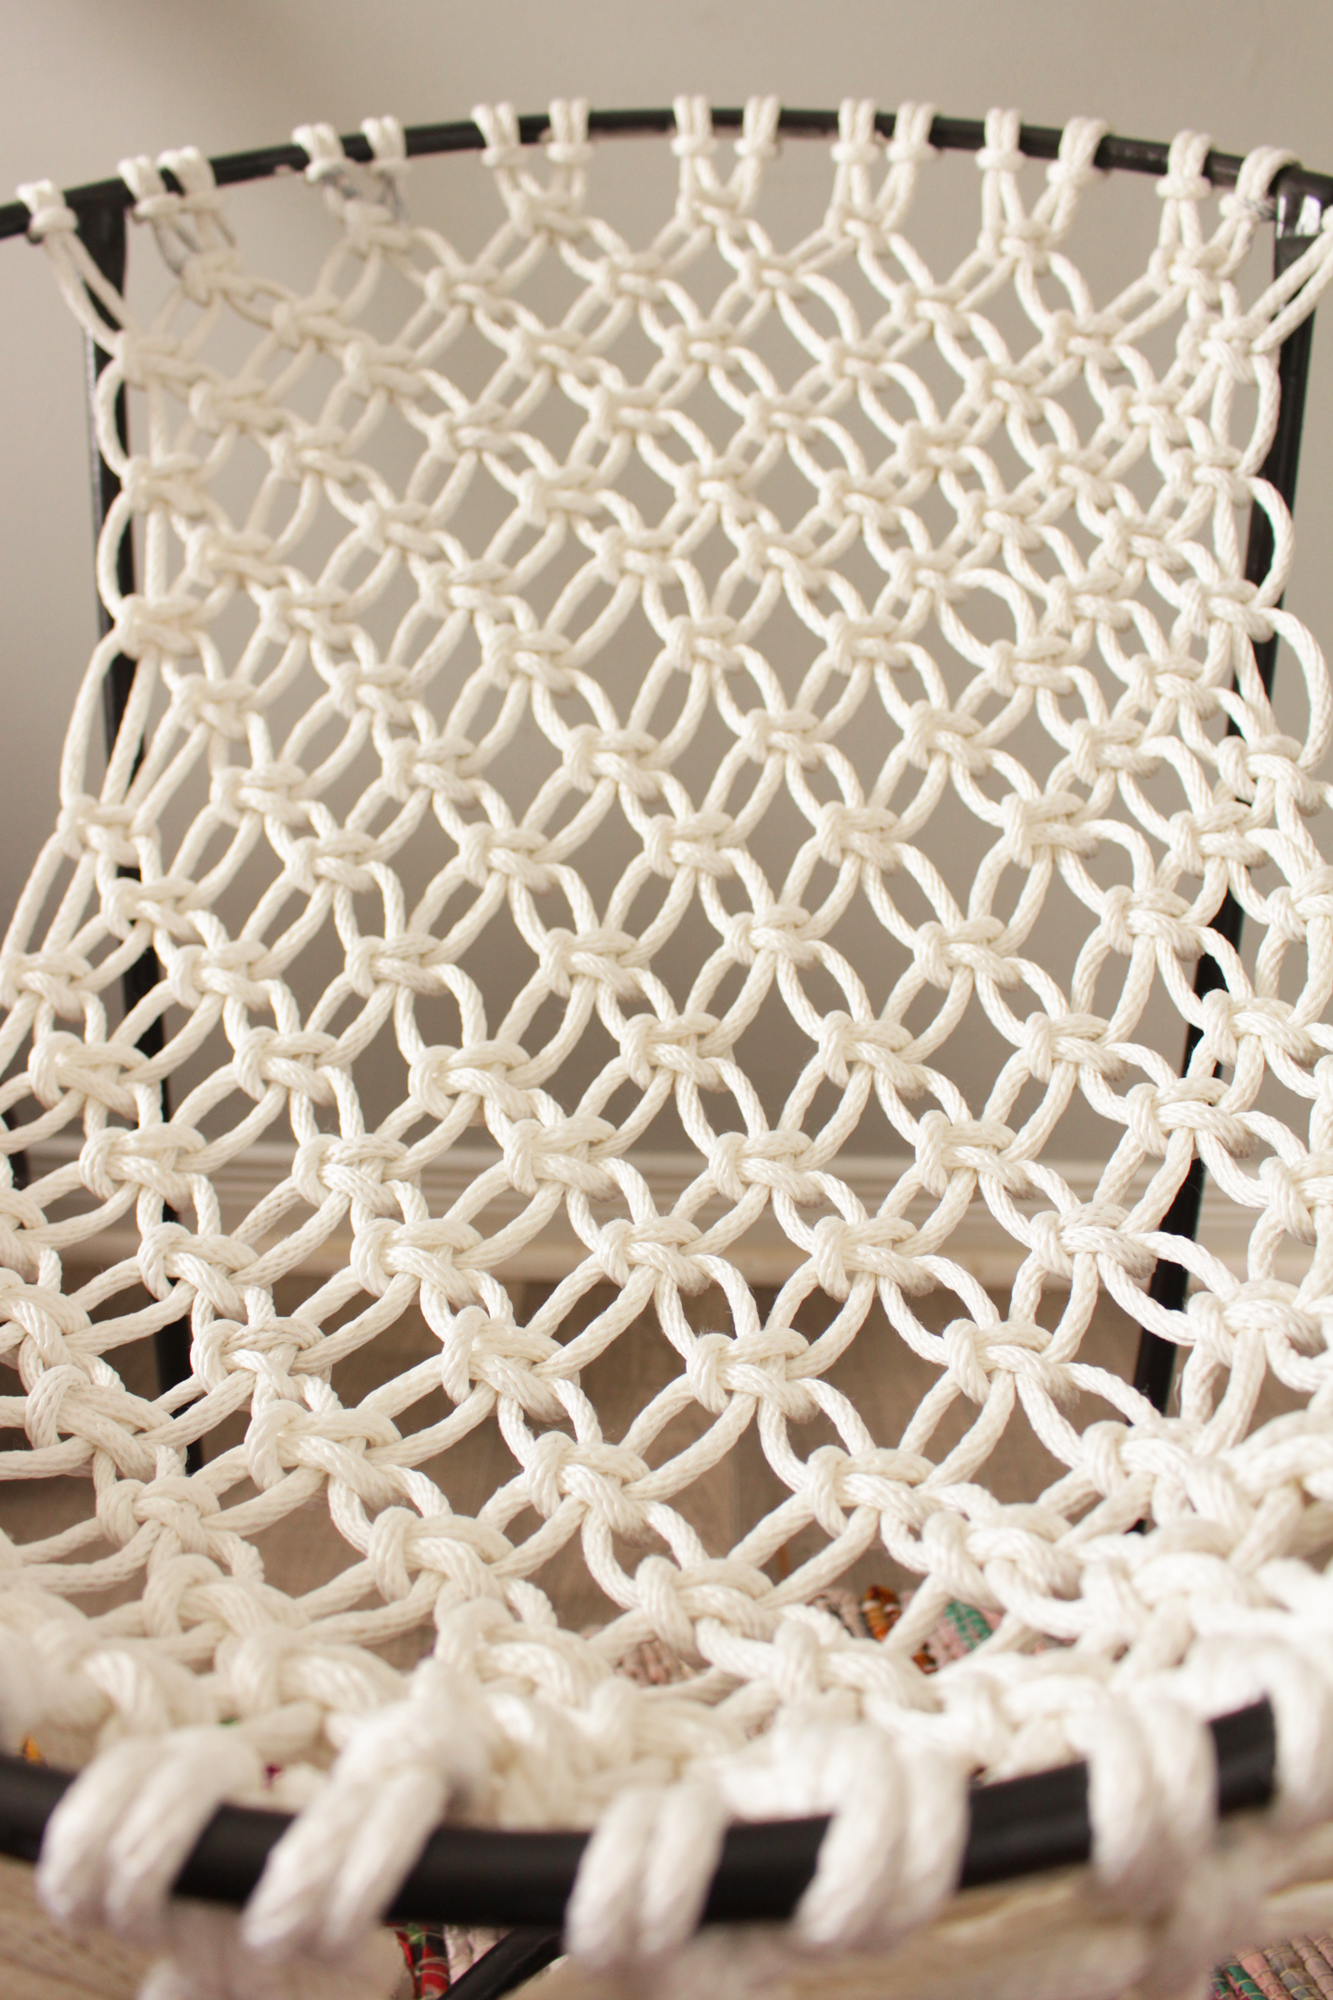
Wouldn’t this be great on your deck or balcony for some cozy patio furniture? Let me know what you think down below and if you will give it a try.
OTHER POSTS YOU MAY LIKE:
A DIY Macrame Keychain Tutorial: Easy and Beginner-Friendly

Anusha, I LOVE this chair!!! I’ll be on the hunt for a frame ;). It gorgeous, well done!
Thanks Megan! That would be awesome, we can have matching chairs!
This looks fantastic, Anusha! I’d love to figure out some way to try this for a hanging chair. Beautiful!
Thanks Lindsay! That’s a great idea, I’d love a hanging hammock.
Amazing work!
Thanks Aaria!
this chair looks super comfy! I bet it’s super easy to sink into. thanks for the tutorial.
It is comfy! Thanks for reading Timia!
This is lovely! Do you know how much weight the technique and rope width can hold? I want to make matching chairs for our sunroom, but my husband is a big guy (6’5″ and over 200 lbs). I’m worried the 1/4 inch rope just wouldn’t be sturdy enough. I’m struggling to find much info online.
Thanks Lori! I don’t know the exact weight it can hold but I would say under 200 lbs is best. My bf and dad have both sat in it comfortably but over time even if it can support more than 200 lbs, the rope would stretch and sag under a lot of weight (and maybe warp the chair frame) so it wouldn’t be comfy for long. You might want something more durable for your sunroom. Good luck!
Hi,
I have the same frame – was the rope you used cotton or more a nylon type?
The rope I used was a cotton and polyester blend. I don’t know if there’s a better type of rope for this purpose but the cotton/polyester blend works well. Good luck Ngaire!
Hello Anusha,
It looks great! I’m thinking of making a simular kind of chair for my baby (hammock swing chair). Can you tell me the brand of the rope that you used? I’m thinking of ordering Bobbiny rope from Poland but yours is looking so nice! Greetings from Holland!
Hey, it’s a standard white cotton-polyester blend meant for a clothesline. You might be able to find it at your local hardware store like I did. Best of luck on your chair adventures!
Hey there… I was just wondering how you managed to make 16 pieces of 17ft lenght out of the rope you have… its just not possible if the rope is bought in 3 parts!
100ft divided by 17 is 5,88… so if I cut 5 pieces of rope from each of the 3 parts, makes 15 pieces of rope…. if I cut 6 pieces of rope, makes 18 parts, but each of them is too short… i just dont get it… would be kinda nice to mention that in your post…
Kati, thanks for bringing this to my attention! It’s meant to say 16 pieces of 16 ft length – it was a typo. When you fold the rope in half, it should be an even 8 ft long. You’ll have plenty of rope length and you can trim the excess off the ends.
Wat a wonderful project, I love it. Thanks for posting your craft!
Thanks Eva, you’re too kind!
Looks comfy cozy and all the tropical vibes!
Charlotte
http://www.deconstrut.blogspot.ca
It’s definitely cozy! Thanks Charlotte.
Hey! I was wondering, do you know, by any chance, the diameter of the circular frame? I wanna try this out with a circular frame i got but im not sure how much rope ill need… thank you!
Hey, the diameter is about 30″. Hope that helps!
I have an old circular frame I am hoping to try this on. I am wondering… how do you finish the bottom and connect it to the bottom of the chair? Thanks!
Gostaria de saber quatos metros em cada fio?
Hermoso trabajo, me encanta el macramé, voy a intentar hacerlo, gracias por compartir tu trabajo y ese gran don que tienes
Hi, how “long” this macrame net has to be ? It looks wonderfull
Hey there, it depends on the length of your chair seat, from the top to bottom. Mine was approximately 4 feet and I added a little extra so that it is not too tight when you sit. Hope that helps!